| Quick Nav Bar | ||||||||
|---|---|---|---|---|---|---|---|---|
| << Previous | Contents |
Selection |
Op Index |
Parent | User Notes |
Index |
Glossary |
Next >> |
 The Color Wand area selection mode allows you to select areas in the image that are similar in color to the area you clicked on.
This is similar to a flood fill operation in paint programs, but with 24 bits you need to specify a variance because in many cases, colors change so subtly that you can't see the change - but the area fill engine can. The specified variance will tell WinImages F/x the amount of difference that is allowed between the selected color and surrounding colors for extendinging the area selection.
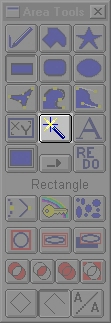
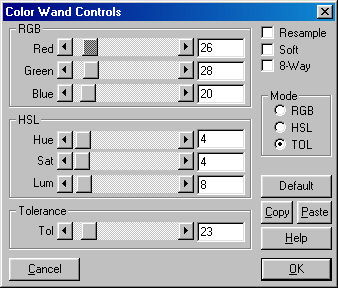
The variance values can be specified for RGB, HSL or Radial Tolerance by right clicking on the Color Wand icon in the tool box, or by selecting the Color Wand Controls... Command from the Area menu. This will present you a set of RGB, HSL and Radial variance sliders. Once you have selected the desired color space and the associated variance(s), select the Ok button to close the dialog. The fill region will then be selected based on the Hue or RGB values of the selected color, the specified variance values, and the three wand options, which are detailed next.
The 8-way wand option causes the wand to extend the selection not just left, right, up and down, but also up and left, up and right, down and left, down and right. This can make quite a difference in how a selection extends when regions are contained by single pixel lines if those lines don't actually make overlapping corners, as demonstrated in the wand examples just below. If in doubt, try your fill both ways.
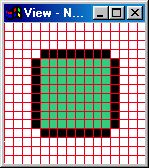 Four-way green fill from center |
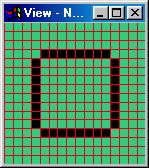 Eight-way green fill from center |
The Soft wand option adjusts the selection's opacity to reflect how different from the sampled color each pixel in the selection is.
|
The Resample wand option, when checked, resamples the color to be compared against at each pixel it works with. This has two notable consequences:
First, and most importantly, most selections will extend much further with the same tolerance settings.Secondly, it will no longer matter where you initially click for any particular region, as the differences between pixels are the same no matter what order they are processed. If this option is not checked, only the sample directly under the cursor is used to make the decision of how far to extend the selection.
The Paste button will take the variance settings that are in the Sample dialog and transfer them to the controls in the Color Wand dialog. This is useful in that you can take a sample, open the wand, press Paste, and the variance for RGB, HSL and Tolerance will all be set according to what was found during the sample.
As an example, the Draw First Working Method area is selected, and then an effect or filter is selected for application to that region. The area that has been selected appears as a dashed outline. In the case of the Color Wand tool, the area of similar colors will be outlined with the dashed marquee.
You could then apply any operation that you like to that area by left clicking on the operation icon. This will cause WinImages F/x to carry out the operation in the highlighted region using the current operation settings. These operation settings can be changed by right clicking on the operation icon. This will bring up the operation control dialog. You could at this point alter the settings, and then apply the effect to the selected region by left clicking on the operation icon.
An area can be added to the first color wand area by holding down the shift key and then left clicking on the color in the image that you would like to add. This can be done an unlimited number of times to add many portions of the image to the area selection.
WinImages F/x also gives you the option of removing areas from the area selection by holding down the CTRL key, and then left clicking on the region you would like to remove. Once an area has been removed, no effect will happen in that portion of the image.
See Also: Area Tools
| Quick Nav Bar | ||||||||
|---|---|---|---|---|---|---|---|---|
| << Previous | Contents |
Selection |
Op Index |
Parent | User Notes |
Index |
Glossary |
Next >> |
| WinImages F/x Manual Version 7, Revision 5, Level B |