
| Quick Nav Bar | ||||||||
|---|---|---|---|---|---|---|---|---|
| << Previous | Contents |
Selection |
Op Index |
Parent | User Notes |
Index |
Glossary |
Next >> |
| a=SHARPEN(percentage, width) |
| Items in CAPS are 0/1 switches or switches with more options than 0/1. |

The Sharpen texture allows you to enhance or sharpen regions of the image. You can specify the effective radius of the sharpening and the amount of application. WinImages F/x will search the selected area for features that are within the specified radius. If a particular feature or surface is within this radius, the light and dark regions of the feature will be increased. This increase will cause that region to become enhanced or sharpened.
For example, if a face in an image was within the specified radius, it would be sharpened based on the Amount setting. This would cause the face to look sharper than the rest of the image. This texture can be thought of as the inverse of a Gaussian Blur (the Blur Operation). It is important to remember that this effect can be very subtle. You can always increase the effect by increasing the radius, but this will require more time for generation of the resultant image.
Trends
You will notice that all of the controls have a Trend button next to them. The trend button allows you to set that variable over a set of frames. Each frame of the animation can be thought of as a slice of time. The trends allow you to alter some, all, or none of the variables for a particular time slice. You will notice that the trend graphs have equidistantly spaced vertical lines. Each of these lines represents a frame in the animation. The number of frames can be altered using the Sequence controls... in the Timeline pull down menu. Animation lengths of 100 - 999 frames will be represented with a vertical bar being 10 frames, and animation length greater than 1000 frames will have a vertical bar for every 100 frames. Click here to view more information on Trends.
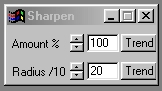
Amount
The amount control allows you to specify how much any detected features will be sharpened. The amount ranges between 0 (no sharpening) and 100 (maximum sharpening) percent. A setting of 0 will result in a null operation, or no effect on the image. Increasing this amount will increase the overall sharpening effect. You can also reduce the sharpen effect by reducing the amount value. This control is set using the slide gadget, or by entering the appropriate value in the text entry field to the right of this control.
Radius
The Radius control is used to set the actual pixel radius that will be used for feature detection inside the area selection. This radius is measured in tenths of a pixel. For example, a setting of 200 is actually 20 pixels. WinImages F/x will scan the selected region for gaussian surfaces that are within the specified radius. For example, with a radius of 180 (18 pixels), a surface that is 15 pixels would be sharpened, and a surface that is 19 pixels would not. Once all of the applicable surfaces have been detected, WinImages F/x will then enhance the light and dark regions of the surface. The overall effect is a sharpening of the selected region. The control ranges from 0 (no effect) to 200 (20 pixel radius). Increasing the radius will increase the time needed for generating the effect, as well as the overall sharpening effect. The control can be set using the provided slide gadget, or by entering the desired value in the text entry field.
| Quick Nav Bar | ||||||||
|---|---|---|---|---|---|---|---|---|
| << Previous | Contents |
Selection |
Op Index |
Parent | User Notes |
Index |
Glossary |
Next >> |
| WinImages F/x Manual Version 7, Revision 5, Level B |